Hello fellow FIM-JiuJitsu Practitioners,
Today we are going to provision Active Directory users let’s now take a walk thru on how to create an outbound synchronization rule and associated workflows and MPRs, import outbound synchronization rules and their associated EREs to the metaverse, and manage accounts in Active Directory.
In Synchronization Service Manager, select the Management Agents tool.
Click Create in the Actions pane, and in the Management agent for drop-down list, select Active Directory Domain Services.
In the Name field, type Adatum AD.
Type the following:
- Forest Name: Adatum
- User Name: Administrator
- Password: “whatever the administrator password”
- Domain: Adatum

Click Next,There is only one domain partition in this case. Select the DC=Adatum,DC=com check box.

The rest of the page refers to the selected partition/domain. We could choose preferred domain controllers, or even make sure that the same one is always used, but we have only one in this case. We could also arrange different credentials for each domain (versus the credentials we typed on the last page so that we could access the forest schema.
Click Containers, deselect DC=adatum,DC=com the check box, and select the Adatum OU check box

Click OK, and then click Next
On the Select Object Types page, select User, and then click Next.

On the Select Attributes page, select the following check boxes
- cn
- department
- displayName
- employeeID
- facsimileTelephoneNumber
- givenName
- homeMDB
- mail
- mailNickname
- manager
- mDBUseDefaults
- middleName
- mobile
- sAMAccountName
- sn
- telephoneNumber
- title
- userAccountControl
Select Show All, and select these additional attributes:
- jpegPhoto
- msExchHomeServerName
- objectSid
- pwdLastSet
- unicodePwd
- userPrincipleName

Click Next four times (because we are not configuring filters, join, projection, or attribute flow here).

Select Stage a delete on the object for next export run, and click Next.
In the Provision for drop-down list, select Exchange 2010, type the Exchange 2010 RPS URI http://VAN-EX1.adatum.com/powershell, and then click Finish

You may receive a warning at this point. If you see the warning, click OK.
Next, we are going to create run profiles and perform a Discovery Import.
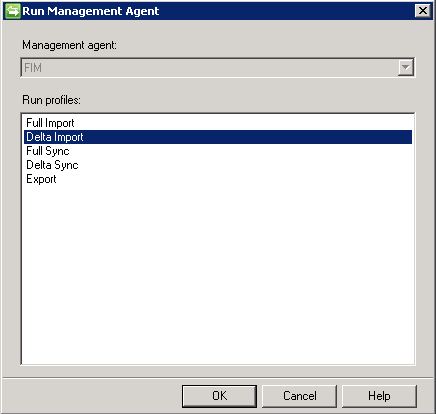
Click Configure Run Profiles in the Actions pane.

Click New Profile, and type the name Delta Import.

Click Next, verify that Delta Import (Stage Only) is listed as the Type, and then click Next.

[Run profiles are defined on a per partition and, so, on a per domain basis. One MA can serve many domains, but will need many run profiles. Also note that it is possible to modify some parameters. There are situations where the conditions are such that you need to extend the timeout, but the batch and page size are best left well alone!]
Click Finish
Now we are going to create Create the following additional Run Profiles. Click New Profile, type the name, click Next, select Type, click Next, and then click Finish for creating each new profile using the following table:
| Name |
Type |
| Delta Sync |
Delta Synchronization |
| Export |
Export |
| Full Import |
Full Import (Stage only) |
| Full Sync |
Full Synchronization |
Click OK.
g. Click Run in the Actions pane, select Full Import (a discovery import), and then click OK. Note that this reports two Adds (the Adatum OU and its parent).


Click Search Connector Space in the Actions pane, and then click Search.

[There are three objects, not two. The third object is DC=com, which is required to complete the hierarchy, but which is not generally shown in dialog boxes, and so on. Any object which is required to be pointed at, but which we don’t really otherwise care about, is created as a placeholder. Other examples would be where a user points to a manager that is in another OU (one not being managed by FIM), or a group membership including such an unmanaged user.]
Our next step is to create a synchronization rule.
Switch to the web browser window. In the portal, click New in the Synchronization Rules page. If you are not on this page, click Administration in the navigation pane, click Synchronization Rules, and then click New.

In the Name field, type Adatum AD User Inbound/Outbound.

[We could create our outbound rule, and then separately define an inbound rule. Functionally there will be no difference, but from an interface point of view there is some economy in combining them. In any case, if you have an MA that only requires an outbound rule, it makes sense to define it as Inbound and Outbound so that any broken joins can be fixed using the Relationship (for example, in a disaster recovery situation).]
Click Next
Select the Metaverse Resource Type as person.
Select the External System as Adatum AD.
Select the External System Resource Type as user.

Click Next
Select employeeID as both Metaverse and Connected System attribute.
Select Create resource in external system (in other words, provision).
Select Disconnect FIM resource from external system when the synchronization rule is removed.

[There are several ways that the synchronization rule might be removed: the person is deleted, the rule is deleted, or (more likely) a workflow that we configure removes it. By selecting this option, we are ensuring that in all cases, the connector space object that corresponds to the provisioned AD user account will be disconnected.
What then happens depends on the configuration of the MA. You will remember that we chose to Stage a delete on the object for next export run, so in our case it will lead to deprovisioning (which will be the desired configuration more often than not).]
Click Next, and then click Next again.
Click New Attribute Flow, and select accountName.

Select the Destination tab, and select sAMAccountname. Click Ok!

Click Ok, Repeat steps m to o to add these outbound attribute flows:
| Source |
Destination |
Allow null value to flow to destination |
| accountName(already added) |
sAMAccountname(already added) |
|
| department |
department |
Yes |
| displayName |
displayName |
|
| employeeID |
employeeID |
|
| givenName |
givenName |
Yes |
| jobTitle |
title |
Yes |
| manager |
manager |
Yes |
| mobile |
mobile |
Yes |
| officeFax |
facsimileTelephoneNumber |
Yes |
| officePhone |
telephoneNumber |
Yes |
| photo |
jpegPhoto |
Yes |
| sn |
sn |

For EmployeeID, select Use as Existence Test.

Click New Attribute Flow, and select accountName.
Click Concatenate Value, select String, and then type @.
Click Concatenate Value, and select domain.
Click Concatenate Value, select String, and type .com.
Select the Destination tab, and select userPrincipleName.
Click OK.

[These are all straightforward and persistent flows of personal attributes, although sAMAccountname is required. If any of them were allowed to flow null, it would do no harm, but some plainly will never flow a null (unless you have someone with only one name, but that is unlikelyunless Prince works at your company 🙂 ]
Now we come to some flows that are needed for the correct creation of a user account and mailbox, and must be set for Initial Flow Only (but not sAMAccountName, because we assume that if someone’s name changed, so would their sAMAccountName, therefore this was made persistent).
Click Next | Finish | Submit (this saves what you have done so far).

Click Adatum AD User Inbound/Outbound (your new rule) to open it again, and select the Outbound Attribute Flow tab.

Click New Attribute Flow, select String, and then type Pa$$w0rd.
Select the Destination tab, and select unicodePwd.

Click OK and select Initial Flow Only for this new flow (you will need to go to page 2 to see it).
Click New Attribute Flow, select Number, and type 0.

Select the Destination tab, and select pwdLastSet.
Click OK, and select Initial Flow Only for this flow also.

[This will create enabled, normal accounts. This kind of flow into userAccountControl should only be done as an initial flow, because AD will be in charge of parts of this number.]
Click New Attribute Flow, select Number, and then type 512

Select the Destination tab, and select userAccountControl

Click OK, and select Initial Flow Only for this flow.
[This will create enabled, normal accounts. This kind of flow into userAccountControl should only be done as an initial flow, because AD will be in charge of parts of this number.]
Click New Attribute Flow, and then select mailNickname.
Select the Destination tab, and then select mailNickname.
Click OK, and then select Initial Flow Only for this flow.
Click New Attribute Flow, select String, and then type True.
Select the Destination tab, and select mDBUseDefaults.
Click OK, and then select Initial Flow Only for this flow.
Click New Attribute Flow, and then select String.
At this point you need the Distinguished Name (DN) of the Exchange Mailbox Database. Rather than typing it in, follow these steps:
Run the ADSI Edit snap-in. (You can either click the shortcut in the Quick Launch, or click Start | Administrative Tools | ADSI Edit).
Right-click ADSIEdit (the top of the tree), and click Connect to.
Select Select a well known Naming Context, select Configuration, and then click OK.

Expand all of these:
- Configuration
- CN=Configuration,DC=Adatum,DC=com
- CN=Services
- CN=Microsoft Exchange
- CN=AdatumOrg
- CN=Administrative Groups
- CN=Exchange Administrative Group, etc.
- CN=Databases
In the pane at right, you should see CN=Mailbox Database 0455042759. Double-click it.

Double-click CN=VAN-EX1.

Double-click distinguishedName, and copy it.
Switch to Internet Explorer. Back in the portal, paste the DN (press CTRL+V) in the empty field under String

Click the Destination tab, and then select homeMDB
Click OK, and select Initial Flow Only for this flow.

Click New Attribute Flow, and select String.
At this point you need the X500 name of the Exchange Server, and one way of getting this is as follows:
Switch to the ADSI Edit window, and then expand all of these:
- Configuration
- CN=Configuration,DC=Adatum,DC=com
- CN=Services
- CN=Microsoft Exchange
- CN=AdatumOrg
- CN=Administrative Groups
- CN=Exchange Administrative Group etc.
- CN=Servers
Right-click CN=VAN-EX1, and select Properties.
Scroll down, double-click the legacyExchangeDN attribute, and then copy its value (it begins /o=AdatumOrg and finishes with the server name).
Click OK, and then click Cancel

Switch to Internet Explorer. In the portal, paste it (CTRL+V) in the empty field under String.

Select the Destination tab, and then select msExchHomeServerName
Click OK, and select Initial Flow Only for this flow.

Click New Attribute Flow, select String, and then type CN=.
Click Concatenate Value and select accountName
Click Concatenate Value, select String, and then type ,OU=Adatum,DC=Adatum,DC=com. This generates a DN. Note the comma before the OU.
Select the Destination tab, and then select dn.
Click OK, and then select Initial Flow Only for this flow.
Click the Inbound Attribute Flow tab.
Click New Attribute Flow, and then select mail.
Select the Destination tab, and then select mail.
Click OK.
Click New Attribute Flow, and then select objectSid.
Select the Destination tab, and then select objectSid.
Click OK.
Click OK, and then click Submit.

Note: For users to be able to log on to the portal, the portal must have their objectSid. Here we are flowing it into the metaverse, but we must flow it out to FIM too.
Switch to the Synchronization Service Manager window. In the Management Agents tool, double-click the FIM MA.

Select Configure Attribute Flow, and then expand Object Type: Person (this makes sure you have the correct object types selected).
Select the Data Source Attribute of ObjectSID, and the Metaverse Attribute of objectSid.

Select Export and click New. If you receive the Synchronization Service Manager dialog box warning you that the connected data source has already been selected, click OK.

Click OK.

Task 4: Create a set of users who will use this rule Complete this Task on:
Switch back to the web browser. In the portal, click Sets in the navigation pane, and then click New
In the Display Name, type All AD Users and click Next.
Click All Resources and select User.
Click Add Statement.
Click Click to select attribute, and select Employee Status.

Click is, and select is not.
Click Click to select value, and type delete.

Click View Members and verify that most of your users are returned (not the ones marked as delete).
Click Finish, and then click Submit.
Note the Status—it is denied. The filter definition is not allowed because our new attribute EmployeeStatus has not been included in a special object that gives permission to use attributes.
Click OK.

In the navigation bar, click Administration.
Click All Resources.
Click Filter Permission.
Click Administrator Filter Permission.
Click the Permitted Filter Attributes tab.
Type employee status into the Allowed Attributes list, and then click Validate and resolve.
Click OK, and then click Submit.

Click Sets, and then click New.
In the Display Name, type All AD Users, and then click Next.
Click All Resources, and select User.
Click Add Statement.
Click Click to select attribute, and then select Employee Status.
Click is, and select is not.
Click Click to select value, and then type delete.
Click View Members and verify that most of your users are returned.
Click Finish, and then click Submit.

Task 5: Create workflows to add and delete the synchronization rule Complete this Task on:
Click Workflows in the navigation pane.
Click New.
In the Workflow Name, type Add AD User.
Select Action.
Select Run on Policy Update (because we need this to apply to existing users).
Click Next.
Scroll down, select Synchronization Rule Activity, and then click Select.
Select Adatum AD User Inbound/Outbound.
Scroll down and click Save.
Click Finish, and then click Submit.
Click New.
In the Workflow Name, type Remove AD User.
Select Action.

Note: Run on Policy Update will not work for this one as we will see later and, in any case, is not needed because no user has one to remove yet.
Click Next.
Scroll down, select Synchronization Rule Activity, and then click Select.
Select Adatum AD User Inbound/Outbound.
Select Remove.
Scroll down, and click Save.
Click Finish, and then click Submit.
Task 6: Create MPRs to use the workflows Complete this Task on:
Click Management Policy Rules in the navigation pane.
Click New.
In the Display Name box, type Sync Rules: All AD users have an AD account.
Select Set Transition, and click Next.

For the Transition Set, type All AD Users, and click Validate and resolve.
Click Next.

Select Add AD User.
Click Finish, and then click Submit.

Click New.
In the Display Name box, type Sync Rules: AD accounts are removed from users who should not have an AD account.
Select Set Transition, and click Next.

For the Transition Set, type All AD Users, and click Validate and resolve.
Select Transition Out.
Click Next.

Select Remove AD User.

Click Finish, and then click Submit.
Click Users in the navigation pane.
Click Search.
Click Amy Rusko.
Select the Provisioning tab.
Verify that she has a pending Add in her Expected Rules List.
Click Cancel.

Task 7: Import the new rule and synchronize Complete this Task on:
In Synchronization Service Manager, in the Management Agents tool, select the FIM MA.
Click Run in the Actions pane. Select Delta Import and click OK.

This generates a lot of adds because your new synchronization rule plus an Expected Rule Entry for most of your users. Click the Adds hyperlink, and examine the properties of a few of the connector space objects.
Close any dialog boxes, and click Run in the Actions pane. Select Delta Sync, and click OK. Click No if prompted with the Run Step Warning dialog. You should see a lot of projections (all the adds you just imported) and then a lot of exports to FIM (these are Metaverse GUIDs being exported), but no new AD accounts!
From the Tools menu, select Options.
Select Enable Synchronization Rule Provisioning.
Click OK.

Click Run in the Actions pane, select Full Sync, and then click OK.
Now your AD accounts are being created. Click the Provisioning Adds link. Examine the properties of one of the AD accounts, and verify that it seems to be a well-formed object ready for export.
Close the dialog boxes.

Select the Adatum AD MA. Click Run in the Actions pane, select the Export profile, and then click OK.
Click Active Directory Users and Computers (ADUC) in the Quick Launch.
Browse to and refresh the Adatum OU, and verify that your users are being added.
Examine the properties of one of the users and verify that it is properly populated (it should have an e-mail address provided by Exchange Server). For example, double-click AdrianD and the Email field should be populated accordingly.
Click Cancel.
Switch to the Synchronization Service Manager, select the Adatum AD MA, and then click Run in the Actions pane. Select Delta Import, and click OK.
Click Run in the Actions pane, select Delta Sync, and click OK. If you are prompted with the Run Step Warning dialog box, click No. Running both the Delta import and Delta Sync profiles will generate important export attribute flows as mail and objectSID (flowed into the metaverse) flow out to FIM. It also generates new adds in FIM, which are the Detected Rules Entries confirming that employeeID has been successfully read back from AD.
Select the FIM MA, click Run in the Actions pane, select Export, and then click OK.

Click Run in the Actions pan, select Delta Import, and then click OK.
Click Run in the Actions pane, select Delta Sync, and then click OK.
Switch to Internet Explorer. In the portal, click Users in the navigation pane, and then click Search.
Click Amy Rusko, and click the Provisioning tab. You should see that the Expected Rule Entry is now Applied, and also that there is a new Detected Rule Entry.
Click Cancel.

Task 1: Configure OU provisioning
In Synchronization Service Manager, in the Management Agents tool, double-click the Adatum AD MA.
Select Configure Provisioning Hierarchy.

In the lower DN Component pane, select ou.
In the Directory ObjectClass pane, select organizationalUnit.
Click New.

Note: What you are indicating here is that whenever an OU is encountered in a DN, you would like to provision an organizational unit.
Click OK.
Task 2: Modify the way DNs are generated Complete this
Task on:  SVR2 a. Switch to the web browser window. In the portal, click Administration in the navigation pane, and then click Synchronization Rules.
Click Adatum AD User Inbound/Outbound.

Click the Outbound Attribute Flow tab.
Click New Attribute Flow, select String, and then type CN=.
Click Concatenate Value, and then select accountName.
Click Concatenate Value, select String, and then type ,OU=.
Click Concatenate Value, and then select department.
Click Concatenate Value, select String, and then type ,OU=Adatum,DC=Adatum,DC=com.

Select the Destination tab, and then select dn.
Click OK.

Note: This is a persistent flow, and so the DN will change when department changes and because the DN is an anchor, this is called a rename (it is not a simple attribute flow).
It is a requirement that the anchor (in this case the DN) has an Initial Flow Only flow, so this does not replace the one we already have. Of course, the existing one must match this new one.
Find your existing DN attribute flow (it may be on the last page of attribute flows so you may need to scroll down), and click it.
Select ,OU=Adatum,DC=Adatum,DC=com, and copy it (press CTRL+C) .
Change ,OU=Adatum,DC=Adatum,DC=com to ,OU= and click Concatenate Value.
Select department, and click Concatenate Value.
Select String, and press CTRL+V to paste ,OU= Adatum, DC= Adatum,DC=com into the empty field.
Click OK.
Click OK, and then click Submit.

In Synchronization Service Manager, in the Management Agents tool, select the FIM MA, and then click Run in the Actions pane. Select the Delta Import profile, and click OK. You should see one update.
Click Run in the Actions pane, select the Delta Sync profile, and then click OK.

Note: There will be at least one flow update (our synchronization rule). Often there will be internal synchronizations happening (such as DREs and EREs settling down). However, although it is in the metaverse, our new rule has not been applied, so this is the right time to use a Full Synchronization to apply the new rule to existing data. We must synchronize an MA (or MAs) so that every employee and contractor in the metaverse is touched by the synchronization process. A full synchronization of FIM will do it, but a full synchronization of Telephone Data would not.
Click Run in the Actions pane, select the Full Sync profile, and then click OK.
You should see a lot of Provisioning Renames for the Adatum AD. Click the Provisioning Renames hyperlink and examine the properties of one of them by double-clicking any distinguished name (note that the change is shown just beneath the Pending Export tab heading).
Verify that it is Pending Export, with the DN about to be changed in AD.
Click Close, and then click Close again.
Select the Adatum AD MA, click Run in the Actions pane, select the Export profile, and then click OK.
You should see a lot of renames. Click the Renames hyperlink and examine the properties of someone by double-clicking any of the listed distinguished names.
Verify that it is Awaiting Export Confirmation.
Click Close, and then click Close again.
Switch to the Active Directory Users and Computers window. In ADUC, right-click the Adatum OU and click Refresh. Verify that OUs have been provisioned and populated.
In Synchronization Service Manager, ensure that the Adatum AD MA is still selected. Click Run in the Actions pane, select the Delta Import profile, and then click OK.
You should see some Adds and some Renames being confirmed.
Click the Adds hyperlink and verify that these are the OUs. Examine the properties of one of them by double-clicking any of the listed distinguished names.
Note: You didn’t see any evidence of the export of OUs. This is because it happened in the background. But now they are seen by the normal import process, and are added just like when you added the Adatum OU when you first ran a discovery import. All these OUs are Import objects. They are pending adds, and they will always be so (unless we project or join them).
Close the dialog boxes, click the Renames hyperlink, and then examine the properties of someone by double-clicking any of the listed distinguished names.
Verify that it is Import (a pending update, in fact).
Close the dialog boxes.
Click Run in the Actions pane, select the Delta Sync profile, and then click OK. If you see the Run Step Warning dialog box, click No
Click Search Connector Space in the Actions pane, and then click Search.

Locate and double-click any user, for example CN=HollyD, and verify that it is all resolved. The tab should read Properties.
ll. Close the dialog boxes.

In Windows Explorer, browse to E:\AllFiles\. Run Cycle Every Minute.bat to run a few full cycles of exports, imports, and synchronizations so that everything settles down.

After a few minutes, close the Cycle Every Minute.bat window.

Task 3: Test the configuration Complete this Task on: SVR2 a. Open the HR Maintenance application by clicking HR Employee Maintenance in the Quick Launch. Change Adrian Dumitrascu’s department from Research and Development to IT. Click Save Changes.
b. Change the Adrian Lannin status from delete to active, and then click Save Changes.
c. Change the Allison Brown status to delete and click Save Changes.

Note: You can now follow the progress of these changes through the synchronization engine, checking the properties of objects as you go.
In Synchronization Service Manager, in the Management Agents tool, select the HR Data MA.
Click Run in the Actions pane, select the Full Import profile, and click OK. You should get three updates. If you examine them, they will be an Import (pending updates). Close the dialog boxes.
Click Run in the Actions pane, select the Delta Sync profile and click OK. If you receive the Run Step Warning dialog, click No. Verify that you get the following:
- Three Connectors with Flow updates. If you examine them, they are now resolved (they show properties).
- For the FIM MA, three Export Attribute Flow to FIM. If you examine them, they are Pending Export (pending updates).
- For the Adatum AD MA, both an Export Attribute Flow and a Provisioning Rename. These are the same object because the department change for Adrian Dumitrascu affects a flow rule and the DN. If you examine it, it is Pending Export and includes all the details.
- For the ADLDS MA, one Provisioning Add and two Export Attribute flows. The Adrian Lannin user has been provisioned and gets export flow to populate it (Pending Export- Update), and the Adrian Dumitrascu user has an export flow for department (Pending Export- Add).

In the Management Agents pane, select the ADLDS MA, click Run in the Actions pane, select Export, and then click OK.
Click Run in the Actions pane, select Delta Import, and then click OK.
Click Run in the Actions pane, select Delta Sync, and then click OK. If you receive the Run Step Warning dialog box, click No. All is resolved, and you could check the results in ADSI Edit.
In the Management Agents pane, select the Adatum AD MA, click Run in the Actions pane, select Export, and then click OK.
Click Run in the Actions pane, select Delta Import, and then click OK.
Click Run in the Actions pane, select Delta Sync, and click OK. If you receive the Run Step Warning dialog box, click No. All is resolved, and you could check the results in ADUC.
In the Management Agents pane, select the FIM MA, click Run in the Actions pane, select Export, and then click OK. Wait a few moments.
Click Run in the Actions pane, select Delta Import, and click OK. Note that there are two Adds and five Updates.
Note: If you examine each of these, you will find that the adds are both Import Add Expected Rule Entries, but if you look carefully at the ExpectedRuleEntryAction attribute, you will see that one is going to do an add (Adrian Lannin), and one will do a remove (Allison Brown). We are seeing the effect of our MPRs reacting to the change of status of two users. The five adds are our three users, but two of them are represented twice because there was the exported change and then the further change to the ExpectedRulesLists made by our MPRs. When two deltas come in for one objects like this, FIM simply works out the resultant.
Click Run in the Actions pane, select the Delta Sync profile, and then click OK. Verify that you get the following (among others):
- Two Projections (the EREs).
- Four Connectors with Flow Updates.
- Our new ERE for adding Adrian Lanni, which has become a pending export because it has been applied.
- Our new ERE for deleting Allison Brown, which is both an Import Add (until that delete has really happened) and a Pending Export Delete (once the account has been disconnected, its job is done and it too gets deleted).
- Adrian Lannin, because the ERL pointing to the ERE has changed (this is all resolved).
- Allison Brown, both for the previous reason and because the Detected Rule Entry (DRE) that previously meant there is an AD account no longer applies, and so the DRL pointing to it has changed (is now null).
- One Metaverse Object Delete (this is a little misleading—it points to Allison who is not actually being deleted here, but really means her DRE).
- For the FIM MA, two Export Attribute Flows (the AllisonB user and the AdrianL ERE) and one Provisioning Disconnect (the DRE referred to above).
- For the Adatum MA, one Provisioning Add with its corresponding Export Attribute Flow (AdrianL) and one Provisioning Disconnect (AllisonB).

Select the Adatum AD MA, click Run in the Actions pane, select the Export profile, and then click OK. Verify in ADUC that the changes are made.
Switch to Active Directory Users and Computers, refresh the Adatum OU, and then verify that Allison Brown is no longer in the Sales OU. Also, you may notice that AdrianD is now in the IT OU, and AdrianL is in the Admin OU.
Note: You can probably see that at this stage it would be good to use E:\AllFiles\Cycle Every Minute.bat, but you may also have realized that we are not, as yet, making use of the active/inactive status to enable/disable the AD account.
Task 4: Configure employee status to control enabling and disabling of AD accounts (userAccountControl) Complete this Task on:
In Synchronization Service Manager, in the Management Agents tool, double-click the Adatum AD MA.
Click Configure Attribute Flow.
In the Data source object type list, select user (verify that the metaverse object type is person).
In the Data source attribute pane, select userAccountControl.
For the Metaverse attribute pane, select employeeStatus.
Select Advanced and Export, and then click New.
Edit the Flow rule name to say userAccountControl (this is case sensitive).
Click OK to confirm.
Click OK.
A dialog box appears. It reminds you that you now need to specify a rules extension. Click OK.
Click Select, and verify that the DLL called Adatum ADExtension.DLL is selected.
Note: The detail of this DLL is beyond the scope of this course, but the code is reproduced at the end of this lab for those who are interested.
Click OK, and then click OK again.
Click OK to dismiss the Synchronization Service Manager warning dialog box.
Click Run in the Actions pane, select the Full Sync profile, and then click OK.
Verify that you see Export Attribute flows, and click the hyperlink. Double-click any of the listed distinguished names. These are Pending Export Updates, flowing 514 into userAccountControl for users who are inactive.
Close any open dialog boxes.
Click Run in the Actions pane, select the Export profile, and then click OK. Confirm that these users have been disabled in ADUC.
Switch to Active Directory Users and Computers, refresh the Adatum OU, navigate to the Research and Development OU, and notice that SteveR and SusanaO have been disabled.
Double-click SteveR, click the Account tab, and notice in Account Options that the account has been disabled.
Click Cancel to close the User Properties dialog box.
Note: We have not applied security rigorously yet. Eventually you will be able to edit employees in the HR system and contractors (like Max Benson) in the portal, but only some attributes of employees in the portal, not including Employee Status. If you do change Employee Status for an employee in the portal now, it will not have any ultimate effect (because the HR application “wins”), but an account might be deleted and added again before the status quo is re-established, which is undesirable (so don’t do it!).
Close all open applications and windows – Now your getting close to promotion to your next FIM-Jitsu belt.


